
Get Insta-Ready: Make Every Outfit Pop
Capture outfits that stop the scroll. Plan outfits, find flattering light, pick clean backgrounds, pose with intent, shoot creatively, and edit thoughtfully. This six-step guide helps you make cohesive, eye-catching shots that highlight style and personality in every frame. Boldly.
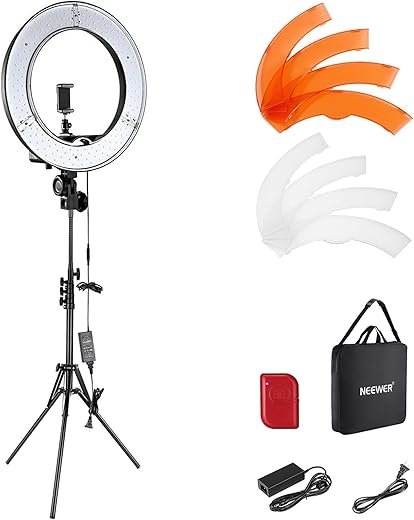
What You’ll Need

Plan Your Look Like a Pro
Why outfit planning beats last-minute panic — and how a little prep saves your feed.Start by choosing a focal piece — a statement jacket, dress, or standout shoes — and build a cohesive palette around it. Mix textures and proportions to add visual interest and avoid clutter.
For example, pair a red leather jacket with neutral knit and slim jeans, or balance a voluminous skirt with a fitted top. Planning reduces shoot time, keeps shots consistent, and helps you tell a clear style story.

Find Flattering Light
Natural light is free beauty lighting — learn where and when it flatters you most.Scout light first: golden hour gives warm, soft tones; open shade and window light offer even illumination without harsh shadows. Avoid overhead noon sun that creates unflattering contrast.
Place your subject in soft, even light. For example, shoot a flowing dress with the sun behind your model at sunset for an ethereal halo, or photograph textured knits in open shade to preserve detail.
Use backlight for rim light and mood, and bring a reflector or white surface to bounce light into shadows. Learn your camera’s exposure controls and lock exposure on faces or key clothing elements so colors stay true.

Choose a Picture-Perfect Background
Boring backgrounds kill looks — use contrast, patterns, and negative space to make outfits sing.Match background to your outfit: use neutral walls or textured surfaces to make bold colors pop. Place colorful looks against pale concrete or brick; layer knits on wood or plaster to show texture.
Use urban murals to add personality — but test the palette first. Avoid pairing small-print garments with busy patterns; a tiny floral dress will disappear against mosaic tile.

Pose with Purpose
Stop posing like a mannequin — try movement, angles, and micro-gestures that flatter your silhouette.Shift your weight to the back leg to create curves and lengthen your silhouette. Angle your shoulders away from the camera and tilt your chin for instant dimension.
Create subtle S-curves: pop a hip, bend the front knee, and keep elbows lifted a touch to avoid flattened arms. Use hands to show accessories—slide fingers into a pocket, touch a necklace, or frame your face.
Think weight distribution: put weight on the back leg to create curves. Use subtle S-curves, bend knees slightly, and angle shoulders away from the camera. Keep elbows lifted a bit to avoid flattened arms. Incorporate movement—walk, twirl, or adjust a jacket—to capture natural moments. Use hands to show accessories or frame the face, and practice a few signature poses in front of a mirror so you feel confident and consistent.

Frame, Shoot, and Experiment
Composition tricks top creators swear by — crop tight, use leading lines, and shoot from unexpected heights.Vary framing: shoot full-body to show proportions, mid-shots for outfit lines, and tight detail shots for textures, jewelry, and hardware. Shoot one of each to tell the full story.
Use composition rules and play with angles:
Use a tripod, set a self-timer or remote, and take many variations—different poses, distances, and focal lengths (e.g., 35mm for context, 85mm for compression). Experiment liberally: unexpected crops and motion blur often become the most shareable images.

Edit Like a Pro (Without Overdoing It)
Good editing lifts an outfit; heavy filters crush it — aim for subtlety and a consistent feed style.Start with basic fixes: crop for composition, adjust exposure and contrast, and correct white balance so garments look true (e.g., remove yellow streetlight casts).
Adjust key settings and use local tools: enhance colors selectively—try +8–15 vibrance on a muted dress, not +40—sharpen fine details like seams and hardware, and dodge faces or eyes slightly to brighten them without whitening skin unnaturally.
Apply a consistent preset or gentle color grade to unify your feed. Export high-res JPEGs in sRGB (Instagram: 1080 px on the longest side, quality 80–90%) to preserve color and detail.
Ready, Set, Post!
Combine planning, light, background, posing, composition, and tasteful edits to create consistent, scroll-stopping outfit shots; practice, review, and refine your process until you develop a signature Insta look. Try it, share your favorite shot, and tag us to inspire others.
48 responses to “6-Step Guide to Insta-Worthy Outfit Shots”
Not gonna lie, I skimmed ‘Edit like a Pro’ and panicked a bit. Filters are addictive.
Does anyone have a go-to subtle preset? I want consistency across my feed without looking like a VSCO clone.
I made a preset that adds +0.2 exposure, +8 contrast, -5 highlights, +3 warmth. It’s subtle but ties my photos together.
Try tone curve gentle S-shape for a little pop. But don’t crush the blacks too much unless that’s the vibe.
Start with small adjustments: exposure, contrast, and a tiny saturation tweak. Save a custom preset with those slight moves. Consistency > dramatic changes.
LOL the ‘pose with purpose’ bit made me laugh. I used to just stand and stare at the camera like an awkward mannequin.
Now I do small movements: tuck hair, look down, step forward. Way less stiff.
Also, anyone else do ‘micro-expressions’ practice in the mirror? weird but effective.
Try singing a line of a song while posing — makes expressions more natural 😂
Micro-expressions are great — subtle changes in gaze and mouth can tell a whole story. Glad the guide helped you loosen up!
I practice smirks and soft smiles in the mirror. Works wonders for candid vibes.
Haha singing method. Also, walking towards the camera slowly makes for great movement shots.
I appreciate the background section — sometimes my hallway looks like a thrift store exploded 😅
Found that clean, textured walls + a plant = insta gold. Also, pro tip: use a small stool to vary heights and make the silhouette more interesting.
Yes! Height changes help a lot. Even just shifting one foot up on a curb or stair can create more dynamic lines.
Stool trick is underrated. Also, shops with patterned tiles make great backgrounds (ask permission!).
Tiny rant: people who over-edit to the point where skin looks plastic make me cringe. The ‘without overdoing it’ section was my favorite — subtlety is underrated.
Also, can we normalize showing wrinkles? Clothes look better on real people lol
Agreed. My rule: if I can tell it’s edited, I dial it back until it looks real again.
100% — texture is part of authenticity. Use tools like frequency separation sparingly if at all.
Preach. Editing should enhance, not erase. We’ll keep promoting natural edits in future posts.
This guide made me actually schedule outfit shoots instead of random snaps. Small victory.
One tiny edit suggestion: add more sample before/after edits so newbies can see subtle changes side-by-side.
Thanks for writing it!
Great idea — we’ll include more before/after galleries in the next revision. Stoked you found the scheduling tip useful!
Yes before/after visuals help a lot. Even just a slider would be helpful for seeing the difference.
Background choice question: does busy city street count as ‘picture-perfect’ or is it too distracting? I love the energy but worried it’ll steal focus from the outfit.
Busy streets can work if you simplify the rest—solid-colored outfit or shallow depth of field to blur the background. Motion blur of pedestrians can also add energy without stealing focus.
Agree. Use a wider aperture (lower f-stop) to blur people out. Or wait for a lull in the action and shoot then.
I shoot in busy streets all the time — pick a single focal point (you) and keep accessories minimal. It helps the outfit stand out.
Would love chapter links inside the guide — jumping to ‘Edit Like a Pro’ took too long on mobile. Small UX gripe.
Otherwise, the step-by-step layout is clean and easy to follow. Loved the mini-examples.
Thanks for the UX note — we’ll add anchor links for each section in the next update to improve navigation.
Yes anchors would be clutch. Especially when you’re mid-shoot and need to check a quick tip.
Loved the lighting tips! I never realized golden hour can be so forgiving for outfits. Tried the side-light idea yesterday and my denim jacket actually looked… trendy? 😂
Quick question: for indoor shots, do you recommend window light over ring lights? I don’t want that harsh studio vibe.
If you’re into a moody vibe, ring light + darker background can be cool. But for most OOTD stuff, natural window light wins. 👍
Agree with admin. Also move a bit away from the window to avoid super-strong side shadow unless that’s the look you’re after.
Totally—window light is usually softer and more flattering for outfits. Try shooting near a large window with sheer curtains; it diffuses light nicely. Ring lights can work for headshots but sometimes flatten textures.
Okay so I usually overthink outfits for hours. This guide’s ‘Plan Your Look Like a Pro’ helped, especially the part about palettes.
I made a little capsule combo for the week and it saved me so much time.
Also tried the ‘pose with purpose’ tips — my mirror selfies actually look intentional now.
Huge improvement, 10/10 would recommend to my roommate.
(also the framing tips are gold)
Would love to see your capsule combos. I always end up overpacking for ‘just a quick shoot’ 😂
Same. My boyfriend thought I suddenly got better at taking pics; I was like, ‘no, it’s the guide’ lol.
Love to hear that! Capsule combos are a game-changer. If you want, share a pic and I can give a quick framing suggestion.
Quick nitpick: the pose examples were great but I wish there were more for plus-size bodies. Felt a bit generic for some shapes.
Otherwise loved the composition advice — the rule-of-thirds tip actually made me rethink a bunch of my shots.
Yes! Poses that highlight curves and movement would be awesome. Also, rocking the breeze (fan or natural) makes everything look better 😂
Thanks for calling that out — totally valid. We’ll add more inclusive pose examples in the next update and include tips for different body types. Appreciate the feedback!
Can someone explain the ‘frame, shoot, and experiment’ bit in plain English? I’m new to cameras and the terminology kinda lost me.
Like: aperture, shutter speed… help!
If you’re using a phone, ‘portrait’ mode handles aperture-ish effects for you. For manual control, apps like Lightroom Mobile give easy sliders.
Also: experiment means try different angles, move the camera around you, try high/low shots. Sometimes the awkward angle is the best one.
Sure — in simple terms: aperture controls background blur (lower f-number = blurrier), shutter speed freezes or blurs motion (faster = freeze), and ISO brightens sensor (higher = more grain). For most outfit shots: wide aperture (e.g., f/2.8–f/5.6), moderate shutter speed to avoid blur, and keep ISO low if possible.
Fun fact: I used the guide’s color palette tip and matched my shoes to a tiny detail in my bag. Felt very put-together.
Also—any tips for shooting reflections? Mirrors, windows, puddles?
Puddle shots at golden hour = cinematic. Get low and use continuous shooting to catch the perfect pose.
For windows, shoot at a slight angle and use a wide aperture to blur background reflections. And clean glass helps 😂
Reflections are awesome for creative shots. For mirrors, mind your angles to avoid camera reflection. For puddles, low-angle shots work best; try a polarizer filter to control glare if you have one.
Made a checklist from the guide and took my first mini shoot this weekend. Steps I followed:
– Plan look (minimal palette)
– Find light (late afternoon window)
– Background: plain brick wall
– Pose: candid walking shots
– Frame: rule of thirds
– Edit: tiny boost to clarity
Results: surprisingly cohesive feed update! 😁
Batch-editing is life-saving. Start with one reference photo, then sync settings across shots and tweak per image.
Yes! Love that you turned it into a checklist. If you want tips on batch-editing to speed things up, I can share a quick workflow.