

How to Tie a Scarf in 6 Easy Steps
MASTER six simple scarf knots to suit any occasion. Whether you want cozy warmth or a polished finish, these clear steps guide you through techniques and tips for different scarf shapes, materials and looks so you always style with confidence.
What You Need
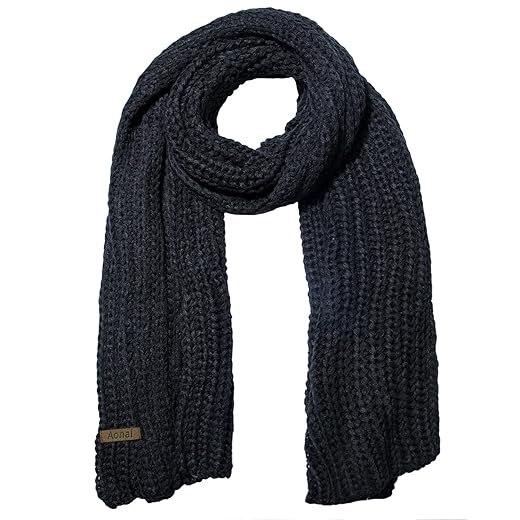
Step 1: Choose the Right Scarf and Prep It
Don’t underestimate color and length — small choices make huge style differences!Select a scarf that fits the look and weather. Choose lightweight silk for dressy outfits, medium-weight wool or cotton for everyday use, and chunky knits for winter warmth.
Inspect the fabric for snags and press lightly if creased. Fold or drape the scarf to estimate where knots will sit and practice the motions without tightening. Stand in front of a mirror to see angles and adjust easily. If layering with a coat, try the scarf over the coat to confirm length and balance before knotting.

Step 2: The Classic Once-Around Loop
Want a fuss-free look that works with coats? This timeless trick is your daily go-to.Drape the scarf evenly around your neck so both ends hang in front. For a cleaner look, shift one end to be about six to twelve inches longer.
Take the longer end and wrap it around your neck one full time, bringing it back to the front. Adjust the loop to sit comfortably against your collarbone; slide the knot left or right for a touch of asymmetry. Tuck both ends under the loop or let them hang loose depending on the vibe you want.
Use these practical tips:
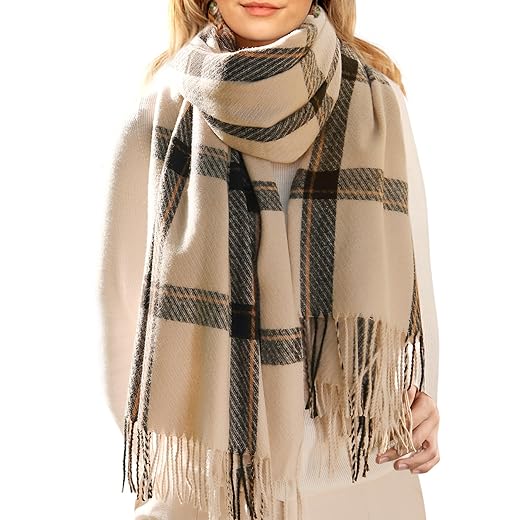
Step 3: The Parisian (European) Knot
Looks complex but takes seconds — expect compliments and office-friendly polish.Fold the scarf lengthwise so both ends meet, creating a loop at the folded end.
Place the folded scarf behind your neck with the loop on one side and the loose ends on the other. Pull the loose ends through the loop and gently tighten so the knot sits at your desired height.
Adjust by loosening or pulling slightly to create a neat V at the throat or a relaxed, slouchy fold. For very long scarves, wrap once around your neck before forming the knot to reduce front bulk. Experiment with loop tightness to change the look quickly.

Step 4: The Pretzel Knot for Casual Chic
Looks complicated — but it takes two moves. Ready to wow without trying too hard?Drape the scarf around your neck with one end about twice as long as the other. Create a loose loop in the longer end by folding it back toward the shorter side. Take the shorter end and thread it through that loop from the top, then pull it partially through to form a second small loop. Feed the longer end under and through the small loop so the shape resembles a pretzel. Tighten gently and slide the knot to one side for asymmetry.
Use lighter scarves for a crisp pretzel shape; chunky knits produce a softer, cozier silhouette. Adjust how tight or roomy the loops sit to match your desired vibe — for example, wear it slightly loose over a trench on a brisk morning.
Pair this knot with a simple coat and jewelry to let the scarf be the star.

Step 5: The Ascot — Dress Up Your Scarf
Who knew a necktie-inspired twist could upgrade an outfit? Formal flair with surprisingly low effort.Drape the scarf evenly around your neck so the ends match.
Cross one end over the other and bring it up through the loop near your throat, creating a loose knot like a soft tie. Fold the broader end over the knot to form a neat panel and tuck both ends gently into your shirt or jacket, or let the ends fan out lightly for a more relaxed look. The Ascot reads as intentional and refined — ideal with blazers or collared coats. Keep the knot soft, smooth the fabric panels flat, and adjust motifs symmetrically for a polished finish.

Step 6: Adjust, Accessorize, and Own It
Tiny tweaks make huge differences — discover pro tricks that instantly upgrade your look.Stand back and assess the overall silhouette: check symmetry, stack, and how the scarf frames your face. Gently tug ends to even lengths and tease loops for volume, but avoid over-fluffing delicate fabrics to prevent frizz. Use a discreet scarf pin or decorative brooch to secure tricky knots or add a focal point — pin a silk twill at the side for a vintage touch.
Choose jewelry to match the scarf’s scale: pair bold patterns with studs and a thin chain; keep statement earrings for plain scarves.
If wearing a coat, tuck ends inside to prevent snagging and wind-buffeting. Carry a small safety pin or foldable clip for quick fixes.
When removing the scarf, fold neatly to preserve shape, store on a hanger or in a drawer, follow care labels, rotate regularly, and try a new knot each week to keep styling fresh.

Conclusion: Wear It Confidently
With these six steps you’ll tie scarves confidently for warmth, polish, or playful flair—practice each knot a few times, adapt to fabrics, and make it your signature. Now try them today, post your favorite look, and tag us to share!
42 responses to “How to Tie a Scarf in 6 Easy Steps”
Cute guide! The once-around loop is my lazy girl’s staple 😅
Pro tip: for thin scarves, fold lengthwise to make them thicker before looping — looks fuller and cozier.
Also, typo on Step 2? ‘Once-Around’ was spelled right but the image caption said ‘Once-ARound’ lol.
Thanks for spotting the typo, Sophia — we’ll fix that caption. Love the folding trick, that’s a practical touch.
Folding works great — also makes the Parisian knot less fiddly with thin scarves.
Haha I saw that typo too. Nice catch! And folding definitely helps.
Super straightforward steps. I used a statement pin in Step 6 and it totally elevated a plain sweater.
Two thumbs up from me!
Yesss pins are lifesavers. Try a vintage brooch for instant character.
Love the pin idea, Ava. Glad it added the lift you were going for!
The Ascot section made me chuckle — I tried it and felt like I was auditioning for a period drama 😂
Kidding aside, it’s actually a neat trick to dress up a plain shirt. Might be my new “fancy but lazy” move.
Same here, felt a bit theatrical at first but then realized it’s just confidence and a bit of swagger.
Haha — that ‘period drama’ vibe is real, but glad it translated into a modern look for you!
Use a narrow scarf for Ascot to avoid too-bulky knots. Makes it less ‘costume’ and more ‘intentional’.
Good guide. Quick q: for windy days, which knot stays put best? I’m tired of my scarves flying around lol.
I put a little hair elastic around the ends hidden under the scarf — works like a charm!
Yes, Parisian and double once-around if it’s long enough. And double-knot the loose end if needed.
For windiness, try the Parisian knot (Step 3) — it’s snug and compact. Also tuck the ends under your coat or use a small clip inside your jacket.
Love this guide — super clear! The Parisian knot tip (Step 3) is my go-to when I’m running late.
Quick addition: if your scarf is slippery, loop it once and tuck a small safety pin at the back so it doesn’t slide.
Thanks for the easy steps!
Great tip, Olivia — a hidden pin can save the day. Glad you found the Parisian knot useful!
Ooh I do this too! Also, a tiny fabric tape on the underside works if you don’t want a pin visible.
Nice — never thought of tape, gonna try that next time.
I tried the full sequence exactly as written and wrote down timing for each step — for busy mornings this helps:
– Prep & choose: 1-2 minutes
– Once-Around: 30 seconds
– Parisian Knot: 45 seconds
– Pretzel: 1-2 minutes (practice needed)
– Ascot: 1 minute
– Adjust & Accessorize: 30-60 seconds
Would love if someone could share tips to shave off seconds — mornings are brutal. Also, what’s the best way to store knotted scarves without creasing them?
If you have limited space, use a scarf ring organizer on the back of a closet door. Saves time and keeps them wrinkle-free.
I roll mine and stash them in fabric bins — keeps shape and easy to grab. For speed: practice while watching TV, you’ll get fast.
Great timing breakdown, Isabella. For storage: hang scarves on a wide hanger or roll them gently and store in a drawer — rolling reduces creases. To shave seconds: practice the two or three go-to knots you use most and keep scarves accessible by the door.
I followed Step 1 (choose the right scarf) and ended up buying three new scarves. So, uh, thanks? 😂
My wardrobe is now 60% scarves. Serious question: does anyone else name their scarves? No? Just me?
You’re not alone. I have a ‘Rainy Day’ scarf and a ‘Show-Off’ scarf.
I name mine ‘The Indispensable’ and ‘The Plot Twist’. Very therapeutic.
Haha — naming scarves is a valid hobby. Glad the guide inspired a mini collection!
Okay, long post incoming because I had thoughts while trying this out yesterday:
1) The once-around loop is perfect for commuting — keeps my coat collar tidy.
2) The Pretzel Knot looked intimidating but actually wasn’t that hard once you loosen the fabric first.
3) The Ascot (Step 5) felt a bit formal for me, but paired with a bomber jacket it worked? 🤷♂️
Overall: good job, could use more images at each sub-step though.
Agree on the images — a GIF for the Pretzel Knot would be perfect. Glad the Ascot paired well with a bomber, that’s a cool combo.
Thanks for the detailed write-up, James — really helpful! We’ll consider adding more step-by-step images in an update.
Helpful article overall, but I think the order should put ‘Adjust, Accessorize, and Own It’ right after the classic loops — adjustability is half the battle when dressing up.
Also: any advice for people with short necks? Some knots feel too long/tall on me.
Also play with scarf width — narrow scarves won’t overwhelm a short neck.
Good point, Ethan. For short necks try shorter scarves or fold them to reduce bulk; the Parisian knot shortened works well. We’ll add a ‘neck length’ section.
Short neck hack: tie lower on the chest rather than close to the chin. Makes it look proportional.
Ok, long comment because I actually tested all six steps with different scarves this weekend and here are my messy notes:
– Silk scarf (large): Best for Ascot and Parisian, looks elegant but slippery.
– Wool scarf (medium): Pretzel Knot and Once-Around are stable and warm.
– Lightweight cotton: Casual, good for the once-around but not for fancy knots.
If anyone’s wondering about accessories: a brooch near the knot can be decorative and practical — keeps things in place.
PS: I had a scarf apocalypse when I first tried the Pretzel Knot (tangled mess) — patience and loosening the scarf helps. 😂
Amazing testing, Grace — these specifics are gold. We’ll incorporate fabric-by-knot examples in the article.
This is exactly the kind of detail I wanted — thanks! Can you share a pic of the brooch placement next time?
Brooch idea is fab. Also, patience and snacks while you practice = essential. 😆
Tried Step 4 (Pretzel Knot) for a brunch date and got compliments, yay! 👍
Small request: could you mention which fabrics work best for each knot? I used a silk blend and it kept coming undone.
Thanks Priya — great suggestion. We’ll add fabric recommendations: lighter silks work for delicate looks but need pins/clips; thicker wool or cashmere hold structure better for knots like the Pretzel.
You can also spray a little starch on silk to give it grip, surprisingly works! 🙂
Agree — I prefer wool for Pretzel and a light cotton for the once-around. Silk is gorgeous but slippery.