
Recut & Revive: The Case for Upcycling into Modern Cuts
Fast fashion produces over 92 million tons of textile waste yearly, yet one well-chosen garment can become a wardrobe staple. Upcycling takes discarded pieces and transforms them into contemporary, intentional cuts that feel tailored rather than patched. It’s sustainable, creative, and often more affordable than buying new designer items.
This guide shows how to choose strong source garments, apply modern design principles, and use practical cutting and pattern-alteration techniques. You’ll learn construction tips, finishing details like hems and hardware, and step-by-step project ideas plus care advice. Read on to turn old clothes into polished, wearable statements. Whether beginner or experienced maker, you’ll leave inspired and ready to refashion today, confidently.


Why Upcycling Matters: Sustainability, Style, and Story
Environmental and practical benefits
Upcycling reduces burden on landfills and stretches the embodied energy already invested in a garment — dyeing, weaving, and finishing. Beyond ethics, it’s economical: turning a thrifted Levi’s 501 or an old Patagonia fleece into a new favorite saves money and resources compared with buying new. Quick, practical step: always launder and inspect a candidate piece before committing—wash, steam, and test seams for weakness.
The value of narrative and rarity
A refashioned piece carries a story: a vintage band tee made into a cropped bomber, a grandmother’s tablecloth refashioned into a statement skirt. That provenance creates emotional value and makes each outcome effectively “limited edition.” For designers, small runs of upcycled pieces are a unique selling point—customers buy the backstory as much as the silhouette.
Style advantages and fit-first thinking
Upcycling invites bespoke adjustments: raise a waistband for a modern high-rise, taper oversized sleeves, or add a structured shoulder to a slouchy coat. Compared side-by-side with fast-fashion equivalents, upcycled garments can offer superior fabric weight (denim, wool) and more interesting details (original pockets, trims). Tip: prioritize fit alterations early—mock up with pins and chalk before cutting.
Common hesitations — and how to solve them
These practical reframes make upcycling accessible, artisanal, and design-forward. Next, we’ll move into how to choose and evaluate the ideal source garments so your vision starts with the right raw material.
Selecting and Evaluating Source Garments
Where to source high-potential garments
Thrift stores, vintage shops, estate sales, wardrobe-edit swaps, and donation bins are treasure troves — aim for solid-fabric pieces (wool coats, denim, upholstery-weight cottons, deadstock shirts). Retail returns and factory seconds are also useful for consistent fabric. Anecdote: a local flea market yielded a 1970s suiting jacket with pristine shoulder pads that became the backbone of a modern cropped blazer.
Fast assessment: quick tests before you buy
Signs of wear, prints, and pattern placement
Look for salvageable areas: intact pockets, cuffs, collars, and panels with centered prints. Prints with a clear motif (band tee, tablecloth repeats) give ready-made focal points. Avoid severe sun-fading across a panel unless you plan patchwork. For plaids and stripes, check matching potential — mismatched seams can look intentional if handled smartly.
Checklist for suitability
Imagining the new silhouette: cut vs. keep
Use the garment’s structure as a guide: keep tailored shoulders, princess seams, or linings when they support your vision; cut away boxy or dated hems and sleeves. If a coat has excellent armholes and shoulder shaping, rework the torso around those seams; if the form is shapeless, harvesting panels for patchwork or creating new darts makes more sense. Deciding whether to cut often comes down to whether existing seams add structural value or constrain your new silhouette — test-fit with pins before committing.
Next, we’ll translate these finds into contemporary design language and pattern moves.
Design Principles for Contemporary Cuts
Contemporary silhouettes: choose your modern language
Contemporary upcycles live between boxy and fitted. Boxy pieces read modern when balanced with clean hems; fitted pieces feel fresh when paired with unexpected details (cropped lengths, elongated jackets, asymmetry). Think: a boxy cropped denim jacket, a slim high-waist skirt, or an elongated blazer layered over narrow trousers. Retail references: weekday minimalists like COS favor boxy-but-clean shapes; Everlane shows how slim lines read timeless.
Proportion, balance, and negative space
Modernity often comes from restraint. Use negative space—simplified fronts, unadorned panels—to let structure breathe. Quick rules:
Clean lines and simplifying details
Remove excess to modernize: eliminate gathers, heavy ruffles, and fussy peplums. Simplify collars to a shorter lapel, band collar, or clean round neckline. When slimming sleeves, take gradual tucks and test mobility; a guided example: remove 1″–2″ total from sleeve seams, baste, and test before cutting.
Integrating trend elements without dating pieces
Pick one statement trend per garment: oversized shoulders OR sports-luxe panels OR high-waist placement. Combine with timeless tailoring—structured seams, neat hems—to avoid fast-fashion expiry. Sports-luxe tip: add a contrast ribbed hem or hidden elastic inside a clean cuff for comfort and edge.
Sketching and mock-up tips
Always prototype:
These design habits reduce waste and give confidence when you finally reach for the shears.
Practical Cutting, Construction, and Pattern Alteration Techniques
Deconstruction: learn by taking apart
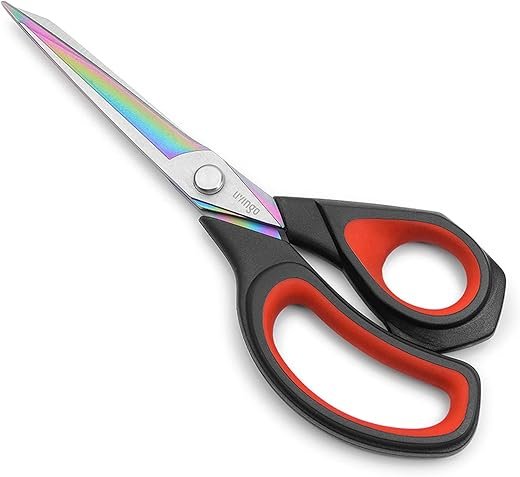
Start by carefully unpicking seams—label pieces with chalk and pins so you can reverse-engineer shapes. Salvage linings, interfacing, buttons, and trims; these often give structure or become new accents. Use sharp shears (Gingher 8″ are a craft standard) and a quality seam ripper (Dritz Deluxe) to avoid fabric damage.
This hands-on unpicking trains you to read garments the way patternmakers do: where darts, ease, and grain live.
Flat-pattern manipulation & slash-and-spread
Trace original panels onto tracing paper. To add volume: slash the paper pattern vertically or horizontally, spread segments evenly, and fill gaps with paper to redraw smooth lines. For cropped lengths, rotate hem allowances up into new seam lines.
Quick steps:
Draping on the form
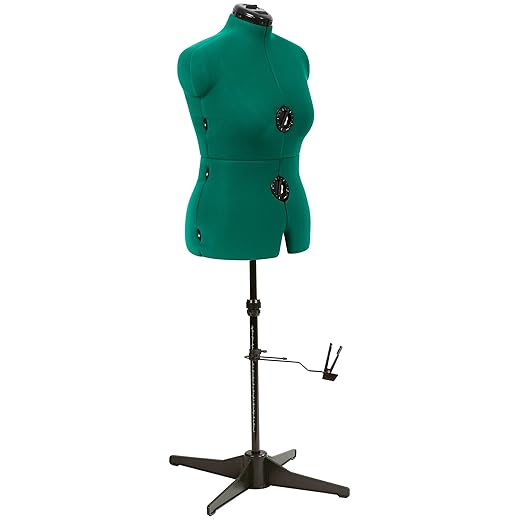
Pin deconstructed pieces onto a dress form to experiment with asymmetry and panel placement. Draping lets you see how bias, pleats, and reoriented seams will fall—especially useful when transforming a skirt into a top or a shirt into a dress.
Zero-waste layouts & repurposing parts
Plan pattern layouts to use every scrap: cut sleeve panels into side yokes, turn skirt tiers into peplum panels, or use pant legs as long cuffs. Techniques to try:
Reinforcing weak points & seam finishes
Stabilize with lightweight fusible interfacing (Pellon SF101 for wovens, softer fusibles for knits). Back fragile buttonholes with small fabric patches. Use:
Knits vs wovens & safe experiments
Respect stretch—cut knits on true stretch grain and use ballpoint needles. For wovens, mind the straight grain to preserve drape. Always make a muslin or baste first: a basted mock-up saves hours and prevents irreversible cuts.
Finishing Touches: Hardware, Hems, and Modern Details
Closures & hardware: small parts, big impact
Choose closures that signal intent: YKK invisible zips read polished; oversized corozo or statement horn buttons feel modern and tactile; Kam or Prym snap systems give a sporty, utilitarian edge. Practical tips:
Hem treatments that read contemporary
Modern hems balance rawness and refinement. Options to try:
Topstitching & edge stabilization
Topstitching elevates perceived quality—use topstitch thread, a 90/14 needle, and 3.5–4 mm stitch length for a bold, even line. For subtle polish, use matching thread and a 2.5–3.0 mm stitch with an edge guide. Stabilize hems and necklines with stay tape or lightweight fusible interfacing to prevent stretching.

Surface treatments & sustainable notions
Keep embellishment minimal and intentional: single laser-cut trims, a small leather patch, or whisper appliqué at a pocket corner. Prioritize sustainable notions: corozo buttons, recycled-metal snaps, plant-based leather alternatives. Anecdote: converting a thrifted blazer into a cropped jacket with corozo buttons instantly shifted its market appeal.
Fit tweaks & final pressing
Small fit changes — adding darts, taking in side seams, or shortening the shoulder — dramatically sharpen silhouette. Finish with disciplined pressing: use a tailor’s ham for curved seams, a clapper for crisp hems, and low-heat pressing cloths for synthetics. These final steps move an upcycle from “handmade” to “hand-finished,” and set you up to try full project walkthroughs in the next section.
Project Ideas, Step-by-Step Transformations, and Care
Oversized button-down → Structured cropped jacket
Assessment: check shoulder seams, sleeve length, and collar salvageability.
Patterning: trace a cropped jacket front/back from a similar garment or block; plan shoulder and sleeve adjustments.
Cutting: preserve collar and placket where possible; cut new length and shape.
Construction: reinforce shoulders with lightweight interfacing, set sleeves, add topstitching for structure.
Finishing: attach corozo or metal buttons, understitch facings, press sharply.
Skill: Intermediate. Time: 3–5 hours. Materials: thrifted button-down, fusible interfacing, buttons, thread.
Dress → Two-piece set (top + skirt)
Assessment: identify waistline, fabric pattern repeat, and stretch.
Patterning: draft a cropped top pattern from the bodice and a straight or gathered skirt from the skirt panel.
Cutting: maximize grain alignment; use skirt hem or waistline as finished edges to minimize sewing.
Construction: add waistbands, linings if sheerness is an issue, and discreet closures.
Finishing: topstitch and finish raw seams with a serger or flat-felled seam.
Skill: Beginner–Intermediate. Time: 2–4 hours. Materials: dress, elastic/zipper, waistband interfacing.

Sweater → Sleek poncho
Assessment: test fabric drape and unravel-prone seams.
Patterning: fold and mark desired shoulder openings and hemline.
Cutting: use a rotary cutter for clean edges; stabilize cut neck with knit binding.
Construction: minimal—finish edges, add a neck facing or ribbing.
Finishing: block to shape; add decorative topstitch or leather tab.
Skill: Beginner. Time: 1–2 hours. Materials: sweater, ribbing, ballpoint needle.
Multiple garments → Paneled coat
Assessment: match weights, shrinkage, and color tones.
Patterning: design panels (back, two fronts, sleeves); sketch seam-placement to balance motifs.
Cutting: transfer panel shapes to each source garment.
Construction: assemble panels with stay-stitching, add full lining for stability.
Finishing: install heavy-duty snaps or a sturdy zipper; edge-stitch for polish.
Skill: Advanced. Time: 6–12 hours. Materials: several garments, lining fabric, heavy zipper/snaps, interfacing.
Care, mending, and presenting
Next, move to practical next steps and how to scale your upcycle practice in the Conclusion.
From Castoffs to Coveted: Your Next Steps
With thoughtful selection, design sensibility, practical techniques, and careful finishing, upcycling turns discarded garments into contemporary, desirable pieces that carry story and sustainability. Start small: choose one source garment, sketch a focused plan, and practice a few cuts and seams—iterate until the fit and details read modern and intentional.
Document your experiments, wear them, and share what you learn; each attempt sharpens skills and builds a catalog of ideas. Continue learning through workshops, pattern books, and maker communities, and remember every upcycled piece is both an environmental act and a distinct creative statement.
55 responses to “Recut & Revive: Upcycle into Modern Cuts”
Good read. I liked the pattern alteration diagrams but wondered if anyone’s tried drafting a new sleeve from a shacket sleeve? Concerned about armhole fitting and using the Dritz dress form to align grain. Thoughts?
Drafting a new sleeve from a shacket sleeve is doable. Key points: true the grainline, add ease for movement (especially if it’s a structured shacket), and baste the sleeve into the armhole on the dress form to check fit before final stitching.
I did this recently — cut a bit more room at the cap if you plan to add topstitching or shoulder pads. Basting saved me from awkward tightness.
I have a fabric graveyard in my closet and this article feels like a funeral director for sad garments, but in a good way 😆. The ‘From Castoffs to Coveted’ section actually motivated me to tackle a 90s blazer that’s been haunting me.
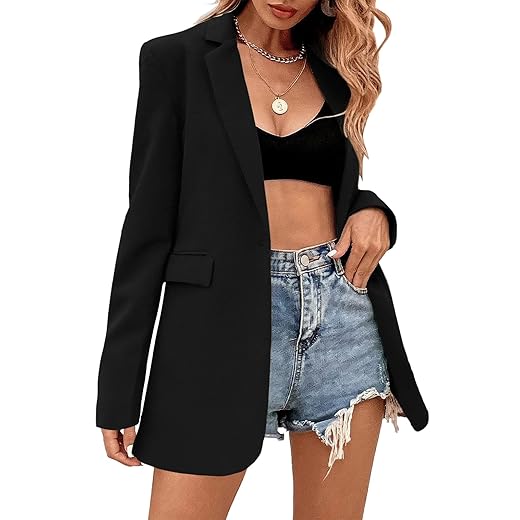
Please do share! I used such a blazer as the base for a cropped jacket and it looked way more modern.
Love that image — glad it motivated you! Share before/after pics if you can, we’d love to feature reader transformations.
Practical cutting chapter was my favorite. The LIVINGO scissors recommendation is on point — they cut through multiple layers without hunting for scissors. One question: any tips for keeping long straight cuts perfectly even when freehanding?
For denim, I clamp the fabric and use chalk + long handled shears. Rotary isn’t great on heavy denim tho.
Use a long ruler or pattern-making ruler and mark the cut line with tailor’s chalk first. A rotary cutter + cutting mat works great for true straight lines on many fabrics. If freehand, try small snips to follow the chalk line rather than one big cut.
I use clips to hold layers and then make small steady snips — helps keep it even.
Huge write-up — loved the step-by-step transformations. I followed the ‘blazer -> cropped vest’ project and documented the process for a friend. A few practical notes from my attempt:
1) Use the Dritz adjustable dress form when fitting the shoulders; lifesaver.
2) The Luca corozo buttons added a vintage vibe — they’re small but make a difference.
3) Hem techniques section helped prevent that amateur wavy hem look.
Question for the author/admin: do you have sizing tips for altering lapel width for petite frames? Thanks!
Thanks for the notes, Maya — great to hear it worked for you. For lapel width on petite frames, reduce lapel height proportionally to body length (usually 20-25% narrower than standard). Also lower the notch slightly so the collar doesn’t overwhelm the neckline.
I do that too — I make a mockup on muslin first and pin lapel until it ‘reads’ right on the form. The Dritz form + pins = win.
Curious — which corozo button size did you use? I want that same vintage vibe.
Practical, chic, and realistic — the article hits a sweet spot. The Sidefeel oversized denim shacket idea as a base for boxy vests and oversized jackets is genius. The construction section demystified a few techniques I was too scared to try.
Small critique: would love a downloadable checklist of tools (scissors, pins, button choices, machine needles) for weekend workshops.
Yes please — a checklist + a simple measurement cheat sheet would save so much time.
Thanks, Hannah — checklist idea is excellent. We’ll add a printable tools-and-supplies checklist in the next update.
A checklist would be amazing for stash organization too!
Really loved the care section — too many people forget that upcycled pieces need attention so they last. Washing tips for mixed-fabric garments and how to deal with old linings saved me a few ruined projects. Question: any specific detergent recs for corozo buttons vs plastic?
Thanks — will try the gentle wash. Also, if buttons are loose, hand-sew them back on before washing to prevent loss.
Mild, pH-neutral detergents work well for corozo; avoid harsh bleaches which can dry the buttons. For mixed fabrics, hand-washing or gentle machine cycles in a mesh bag are safest.
As someone who travels a lot, the Maxfanay 200-piece travel sewing kit shoutout made me smile. Compact but actually useful for quick repairs. Paired with a lightweight Brother XM2701 for workshops, this could be an excellent mobile setup. Anyone else set up pop-up repair stations?
Pop-up repair stations are a fantastic community idea. The travel kit covers basics; add a mini pressing cloth and a few sample threads and you’re set.
Tip: print a small checklist to hand out so people know what they can realistically fix in 15 mins.
I’ve run a weekend pop-up and people loved the quick fixes. Bring spare buttons and a simple form (or clamp) to pin things to.
Community mending events are great for teaching upcycling basics too.
Solid content but felt light on visual step sequencing for the trickier alterations — like rewriting the shoulder seam or repurposing sleeve plackets. The Brother XM2701 tips are good but could use close-up photos. If you add more images, this goes from ‘readable’ to ‘tutorial-grade’.
Fair point, Samir — we aimed for wide coverage but will add more close-up photos and a few video clips for complex steps in the next upload. Appreciate the honest feedback.
I follow a few YouTubers for close-in shots; maybe link to a curated list in the article?
Videos for shoulder/armhole work would be clutch. Even a GIF of the basting step would help.
Agreed on the close-ups. Sometimes a single well-lit photo makes all the difference.
Loved the finishing touches section — the little bit about hemming with invisible stitches changed my life. Also, corozo buttons are gorgeous but i had to sand one slightly to get the color to ‘match’ my piece (pro tip!). Hemming advice was super practical. 🙂
PS: tiny typo in the hardware paragraph, ‘thier’ not ‘their’ — no biggie tho!
Sanding buttons = next level. I might start doing that to everything lol.
Thanks for the catch, Zoe — we’ll correct the typo. Great tip on sanding corozo to match color subtly, that’s a clever customization hack.
Small detail nerd here: the Luca Classic Matte Burgundy set was an inspiring callout. Buttons are often an afterthought but they anchor the whole look. If anyone’s hemming heavy jean layers, also consider topstitching with thicker thread (gives that pro finish).
Omg yes topstitching makes everything look ‘done’. Also, corozo feels way better than cheap plastic buttons imo.
Agree — hardware and buttons change a garment’s perceived value dramatically. Thicker thread for topstitching is especially helpful on denim or structured blazers.
Upcycling is cool and all, but is it just me or does it sometimes feel like glorified patchwork? 🤔 Still, some of the construction tips were actually impressive.
Not just you — there’s a big range in upcycling quality. The goal is to move past patchwork-y results with pattern thinking and clean finishing (hardware, hems, proper interfacing).
I felt the same at first, but once you learn to evaluate drape and structure (they covered that), pieces start looking intentional not glued-together.
Loved the tool roundup — been eyeing the LIVINGO 9.5″ scissors for months. Article’s tips on cutting through seams made me less nervous about slicing into a thrifted blazer. Also good shout on the Brother XM2701 for beginners; lightweight but does the job. Quick Q: any tips on tension settings when sewing thick denim layers?
I’ve been using the XM2701 on a denim shacket — set tension around 4-4.5 and use a topstitch needle for clean results. Also slow down speed to avoid skipped stitches.
Great question — for denim you usually want a slightly higher tension than usual and a heavier needle (90/14 or 100/16). Use a walking foot if you have one, and test on scrap layers first.
If you get bunching try loosening bobbin tension a tad. And YES to testing on scraps!
This article was super encouraging for a beginner like me — the Maxfanay travel sewing kit mention made me smile bc i actually have that exact kit 😅
The step-by-step made it doable and the list of essential tools (scissors, needles, seam ripper!) was spot on. A lil typo on page 3 but no biggie.
Also — anyone else find the Brother XM2701 bobbin a bit fiddly at first? 😩💥
Don’t forget to oil if your machine manual says to — but carefully, just a drop in the specified spots.
Yep, seen that with a few machines. Try rethreading top and bobbin slowly and watch for any abnormal noise — sometimes it’s just a misfeed.
Also try a fresh needle; I replaced mine and the jamming stopped. Pro tip: keep extra bobbins so you can preload threads.
If you’re traveling with it, secure the presser foot and needle so nothing rattles loose 😅
Thanks for the heads-up on the typo — we’ll fix it. The XM2701 bobbin can be tricky; make sure the thread is seated properly in the slot and that the bobbin case is clean. A tiny bit of lint can cause issues.
Okay, big love for the design principles section — it actually made me rethink proportions.
I tried turning an oversized denim shacket into a cropped boxy jacket following the article and ended up keeping the original pocket placement (score!).
Couple of notes:
– The piece on negative space and shoulder lines could use more side-by-side photos.
– The Febriajuce oversized blazer idea was genius for lapel reuse.
Will definitely bookmark for future refurbs 😊
Haha @Ben same — ended up with a jacket that screams ‘I put my hands in weird pockets.’
Totally agree on the photos — screenshots or sketches would make the shoulder adjustments easier to visualize.
Pocket placement is EVERYTHING. I ruined one jacket by moving them too low lol.
Thanks for the feedback, Lisa — glad it helped! We’ll consider adding more side-by-side imagery in a follow-up. The lapel reuse trick is one of my fave hacks too.